"We seldom get into trouble when we speak softly. It is only when we raise our voices that the sparks fly and tiny molehills become great mountains of contention."
Homemade Flatbread (Greek Pocketless Pitas with a Simple Tutorial)
by Melanie Gunnell
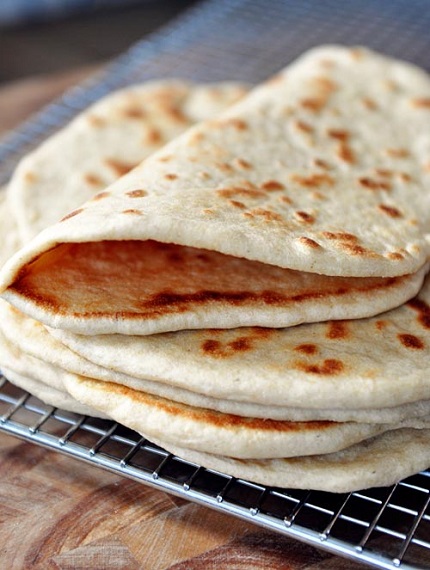
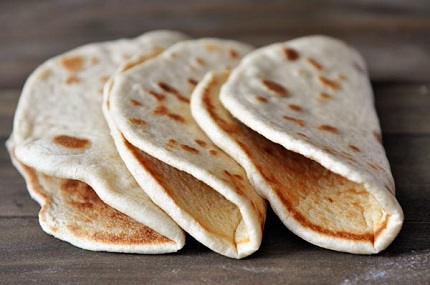
Flatbread is yummy.
Soft, fluffy homemade flatbread is even yummier.
If you are wondering
why on earth you would ever want to make your own flatbread, I have
two words for you: Chicken
Gyros. And wait! Four more: Big
Fat Greek Tacos. And how about? Simple Pita Pizzas.
The truth is, I could
bombard you with a hundred more words that sum up why flatbread needs
to be part of your life but I won’t (phew!). Basically, this
flatbread is extremely versatile; you could use it in so many
different ways and it is really simple to make.
Those of you who have
seen or made the soft
wrap bread (that I adore) and/or this lovely naan
bread (which I also adore) may want to know how this
current flatbread differs. It’s slightly thinner and a bit
softer than the naan (so it bends easier) and has a completely
different taste than the soft wrap bread (since the soft wrap bread
has a potato base).
I think the moral of
this story, though, is you can never have too many flatbread recipes
in your recipe notebook. Right? Right.
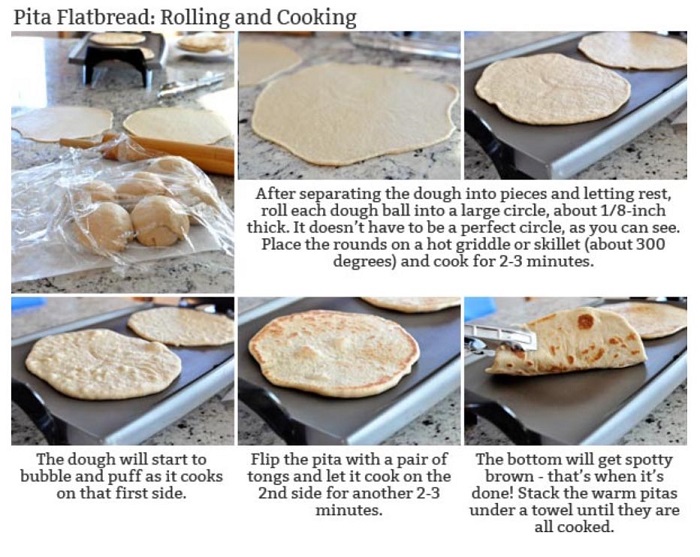
I included a few simple
step-by-step photos of rolling and cooking the flatbread. Once you
see it, you’ll realize how easy it is. I always double or
triple this batch, fire up the griddle and cook my heart out so I can
freeze these babies to pull out at a moment’s notice.
We really do capitalize
on the simple pita pizza thing (throw it under the broiler with all
the toppings for a minute or so and you are good to go) as well as
rolling up our favorite sandwich fixings for lunch.
Flatbread! It’s a
really good thing.
Homemade Flatbread {Greek Pocketless Pitas}
Yield: Makes 6-8 flatbreads
As with all yeast
doughs, I never use the flour amount called for in the recipe as a
hard-fast rule (unless a weight measure is given, and then I pull out
my kitchen scale).
Because humidity,
temperature, altitude and a multitude of other factors can affect how
much flour you need in your yeast doughs, I always judge when to quit
adding flour by the texture and look and feel of the dough rather
than how much flour I’ve added compared to the recipe.
This tutorial
on yeast may help identify how a perfectly floured
dough should be.
Since I don't always
have bread flour on hand, for this recipe, several times, I've used
about 2 3/4 cups flour plus 1/4 cup wheat gluten (to approximate the
same properties as bread flour). I've also subbed half the flour for
white whole wheat flour, too, with good results.
Also, if you want to
use active dry yeast instead of instant, let the yeast proof in the
sugar/water mixture until it is bubbly and foaming before proceeding
with adding the other ingredients.
Ingredients
2 teaspoons instant yeast
1 teaspoon granulated sugar
2/3 cup warm water (about 100 degrees, warm but not hot to the touch)
1/2 cup warm milk (about 100 degrees, warm but not hot to the touch)
1 tablespoon extra-virgin olive oil
1 teaspoon salt
3 cups bread flour, more or less (see note above)
Directions
In a large bowl (or bowl of an
electric stand mixer fitted with the dough hook), mix the yeast,
sugar water, milk, oil, salt and one cup of the flour until well
combined.
Gradually add the remaining flour
until a soft dough is formed. It will pull away from the sides of
the bowl to form a ball but still be slightly soft to the touch (see
the note). Knead the dough for 4-5 minutes until it is soft and
smooth.
Place the dough in a lightly
greased bowl and cover with greased plastic wrap; let rise until
doubled, about an hour or so.
Divide the dough into six or eight
equal pieces. Cover with a cloth or plastic wrap and let the dough
pieces rest for 10-15 minutes (this helps relax the gluten so they
are easier to roll out).
Working with one piece at a time,
on a lightly greased or floured counter, roll the dough about
1/8-inch thick into a large circle, about 7-8 inches in diameter.
Heat a griddle or skillet to
medium heat (I preheat my electric griddle to 300 degrees). When the
griddle/skillet is hot, cook the flatbread for 2-3 minutes on the
first side until it bubbles and puffs. Flip it over with a pair of
tongs and cook on the second side until it is golden and spotty. If
the skillet isn't hot enough, the bread can turn out dry (and won't
bend easily) from being overcooked so look for the right amount of
heat that will cook the flatbread in 2-3 minutes max per side.
Transfer the flatbread to a plate
or work surface and cover with a clean kitchen towel. Repeat with
the remaining dough (I can fit two pieces of flatbread on my
electric griddle so I roll out two at a time), stacking each warm
flatbread on top of the others and covering with the towel.
The flatbread can be made, cooked,
cooled and frozen with great results. It is best served the day it
is made but can be reheated gently the day after, if needed.
Recipe
Source: adapted from Jaclyn
at Cooking Classy
(reduced sugar, oil and salt, used instant yeast and adapted bread
flour amounts, as well as adapting the method a bit)
Melanie Gunnell is a food-loving, chocolate-obsessed mom who has a desperate need to share
her favorite tried-and-true recipes with the world. In a past life she graduated from Brigham
Young University with a degree in public health, but for the past ten years, stay-at-home
motherhood has been her job along with blogging-from-home for the past five.
She resides in the brilliantly cold tundra of Northern Minnesota with her husband and their brood
of five children: four boys and one tiny, bossy girl. Dark chocolate (particularly the act of
shoving chocolate chips in her mouth whilst hiding in the pantry) is her coping skill of choice for
both the never-ending winters and the never-ending wrestling matches in her front room.