"We seldom get into trouble when we speak softly. It is only when we raise our voices that the sparks fly and tiny molehills become great mountains of contention."
If
you have children, you’re probably like me — always
looking for something special to personalize your son or daughter’s
space. For this particular piece, I wanted to highlight my daughter’s
first year of life and I had an old window that was begging to be
“upcycled.” Just being able to glance at her life in a
few moments fills me with happiness and joy in remembering each
snapshot taken. You could even create one of these with small photos
for all of your family members with your last name across the top.
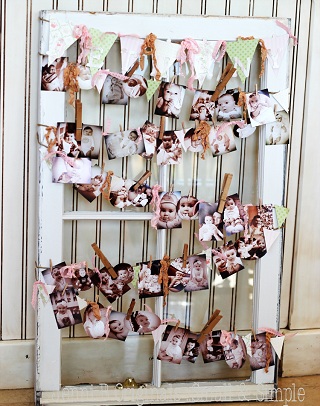
This
Memory Window only took me about an hour to assemble after all of the
photos were cut out.
Here’s
what you’ll need:
An old window in any color
Photos sized to around 2” - 3” in differing shapes
Twine
Scissors
Coordinating papers – 3-4 pieces
Clothespins – large and small
Ribbons or any other embellishments to tie on the garland
Glue gun with glue
1. You’ll
want to make sure your window is nice and clean. Just give it a wipe
down with a warm wet rag.
Start with a clean window.
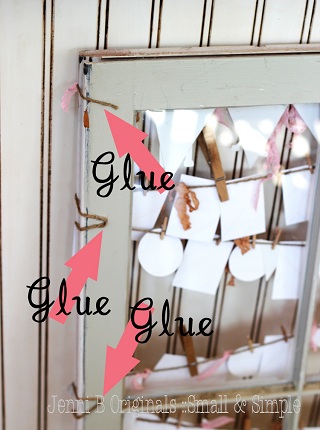
2. Next
you’ll take your twine and hot glue it to the back of the
window, as illustrated below. You can see where I started by taking
one end of the twine and gluing it about 1” inward, about 2”
from the top of the frame. Let me remind you: Only glue on the back
of the frame. I wanted to have 6 different levels on which to hang
the photos, so I just glued down the twine, let it dry, and then
changed angles to wrap it around the front again.
Only glue on the back of the frame!
3. Lay
out all of your photos in order. Then determine how many photos you
can put on each row. Pin them on with the clothespins (or just glue
them on with the hot glue). Then add your ribbons or other
embellishments. On mine, I used some paper pennants and spelled out
my daughter’s name across the top. Just keep filling in with
ribbons and embellishments until your desired effect has been
accomplished.
Jenni Bowman, also known as "Jenni B," first delved into her creativity when decorating her
new home as a young bride on a small budget. Bit by bit, her skills improved. She appeared on
"The Martha Stewart Show" in December 2007, where she demonstrated some of her products
on live national television. She has also appeared on "Good Things Utah" and even had her own
television show, "Crafting with Jenni B," in rural Virginia.
She has been featured on Make Mine Pink in "Women Who
Inspire," an online marketplace designed especially for women. In the Spring of 2009, Jenni was
featured in "Artful Blogging" and "Marie", which are Stampington & Company and Somerset Studio publications. She was also listed in Utah Valley Magazine's "50 Most Fabulous People".
Jenni is currently the president of Jenni B Charmed, LLC and enjoys designing jewelry,
computer graphics and home accessories. She lives in Salt Lake City with her husband and
young daughter.
Jenni serves as a Relief Society instructor in her home ward.