You can make your builder's grade
bathroom mirror look beautiful with about $50 and a little elbow grease.
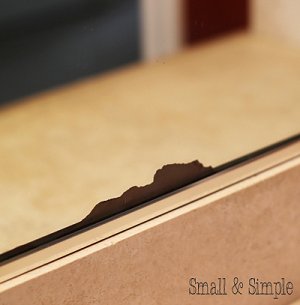
When we moved into our new home a couple of months ago, I noticed a big
dark spot under the edge of one of the bathroom mirrors (see photo below). It
was pretty noticeable, but I knew there had to be a solution. After looking on
the internet for some ideas, I found some tutorials where people had just added
a frame of molding to the outside of their builders' grade mirrors. The look was
totally custom!
The spot on this mirror illustrates what
happens to those builder's grade bathroom mirrors. They don't look good even
without the spots!
With the help of our contractor, who was doing some other work in our home,
we put this baby up in about 15 minutes flat! Better yet, the materials only
ended up costing around $50.
Although I had my contractor help me with cutting the molding and adhering
the mirror, I don't see why anyone with a miter saw or miter box couldn't do
this project with a couple of people.
What you'll need:
Enough molding to surround your bathroom mirror
Paint and/or glaze
Paintbrush
Miter saw or miter box and hand saw
Silicone & silicone gun
Painter's tape
Buy your molding. I discussed my mirror idea with my contractor, Kelly.
He had never seen it done before but thought it sounded like a fun idea.
He helped me measure how much molding I was going to need. I went to
my local home improvement store and found some molding that you
could buy by the piece instead of by the foot. What I found was white
plastic "casing" that was a little over $11 per piece.
Start painting! I decided on a creamy white paint that I already had at
home. I only did one coat and then added some glaze afterward.
To apply a glaze (mine was Van Dyke Brown from Sherwin Williams), just
paint on a tiny amount with a sponge brush and then wipe off with a soft
cloth. I also ended up going back to the store and buying an additional
piece of wood to add to the original. This made my frame extra wide but it
still looks like one piece. These pieces were $5 each.
Putting two pieces of wood together
makes the frame twice as wide.
Now you're ready to cut your pieces. Remember - it is always better to
cut them a hair too big and trim them down if needed. You'll never be
able to add back to the wood! We measured the outside edge of the
mirror to see how long the pieces needed to be and cut them down with
the miter saw at a 45-degree angle.
Then we measured the inside edge of the large molding piece and cut the
smaller board to fit the inside edge. Here are the boards after cutting:
Notice those beautiful mitered edges!
Now adhere the boards to the mirror. I was planning to use Liquid Nails
to adhere to the mirror, but since some of my boards were made of
plastic, my contractor suggested we use silicone. We just took the
bottom edge piece and ran a long bead of silicone across the bottom,
then dotting some silicone every 6 inches. We put the sides on next and
the top piece on last. Then we went ahead and added the smaller pieces.
You'll want to tape the corners with painter's tape to secure them. Also
tape the top piece up really well and leave the tape on overnight.
You can go ahead and seal up the gaps in the corners (if there are any)
and touch them up. This makes it look really professional!
Take off the tape pieces the next day and you're all done.
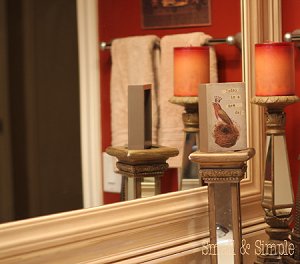
The finished product shows how
much nicer the bathroom counter looks with a frame than it did with the
mirror only in the "spot" picture.